Using an Audio Probe to Diagnose Issues in a Pedal Circuit
To build one, all you'll need is:
- 2x test leads with crocodile clips (buy on amazon)
- 1x 1/4" mono jack
- 1x 100nF capacitor
- 2x guitar cables
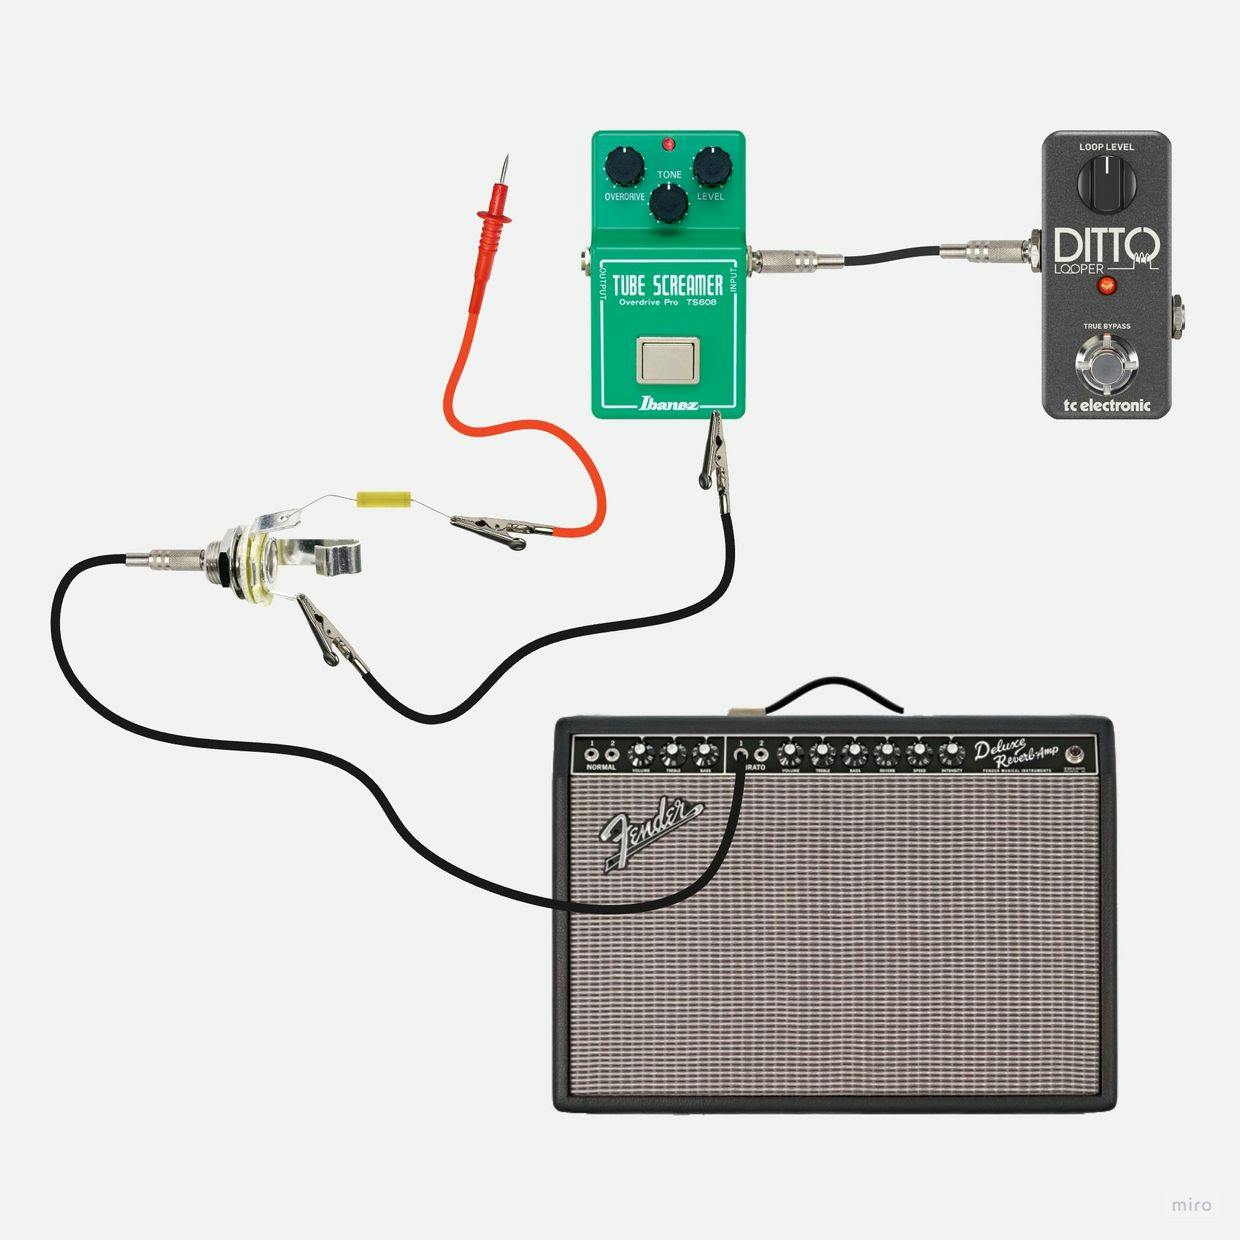
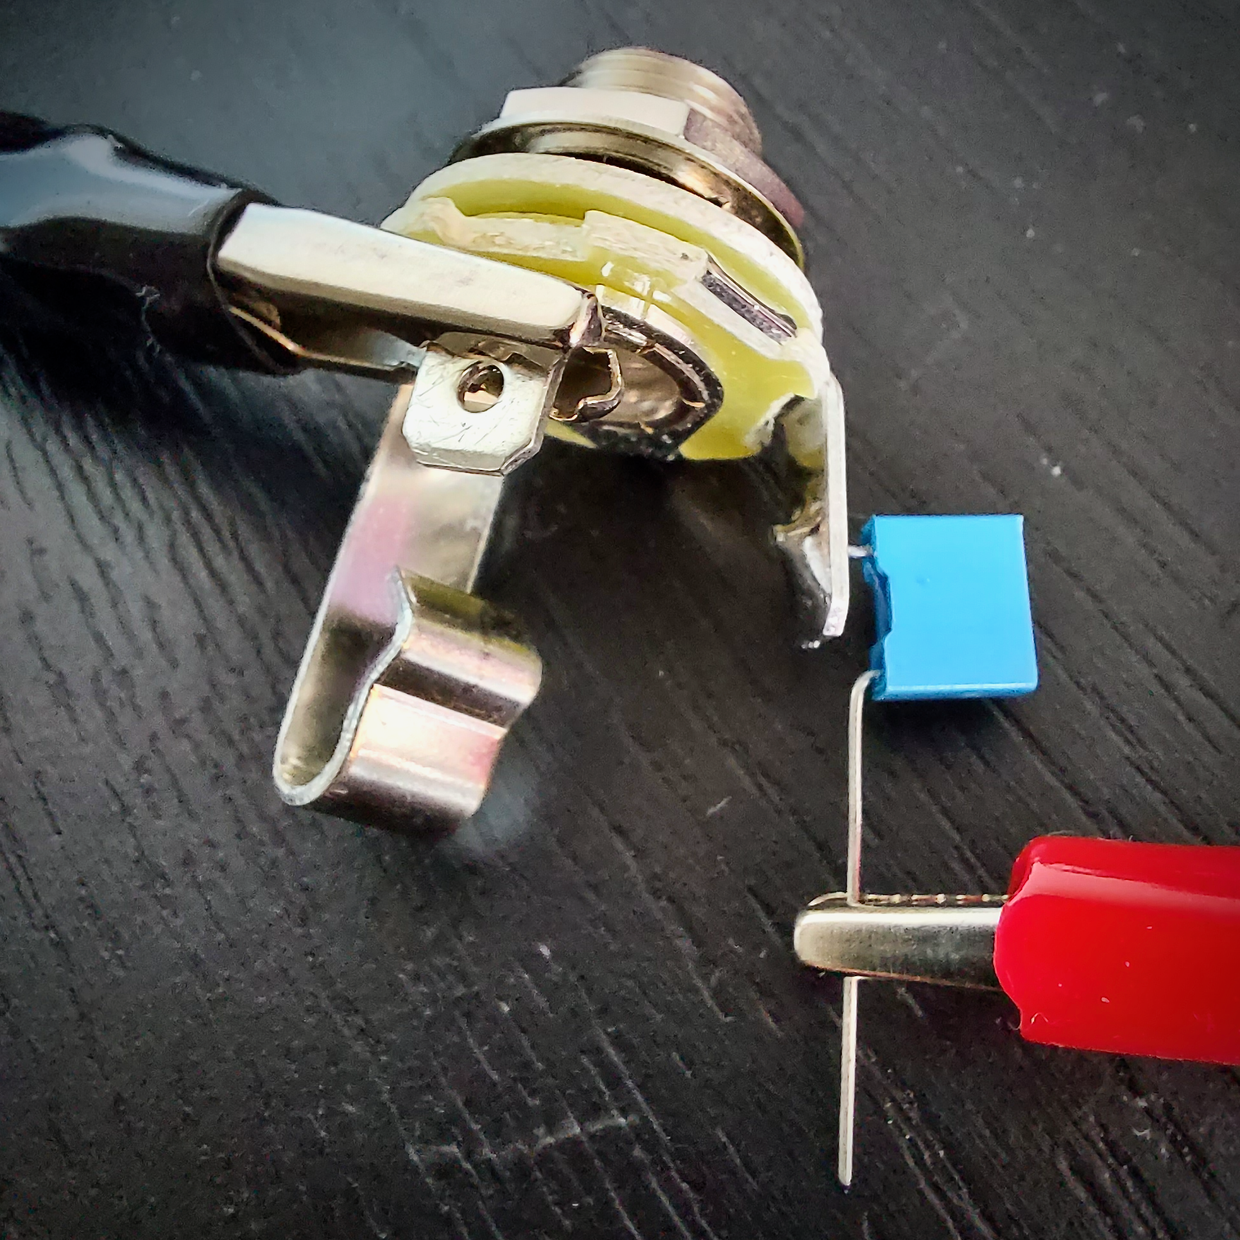
To get started, attach the capacitor to the jack tip and connect the red test lead (positive) to it. Then, connect the black test lead (ground) to the jack sleeve.
The idea is that as you probe the circuit board, you should hear the audio signal coming through. When the audio signal stops, you've likely pinpointed the source of the issue. Setting up a loop can significantly simplify the process, enabling hands-free work.
I'm using the looper in my HX Stomp, so I've added a looper block and recorded some strumming. With the loop recorded, I've routed from the effects send of the HX Stomp into the pedal's input. Next, I've connected another cable to the jack + capacitor, running it into the effects return of the HX Stomp. I've also added a send/return block (this is my pedal), along with an amp/cab block. The signal then goes out to my audio interface and monitors.
If you're using a looper pedal and an amp, the process is the same: record a loop, route the looper's output into the pedal's input, and then connect an additional cable from the jack + capacitor to your amplifier.
Do not connect anything to the pedal's output; this is where the audio probe comes into play. The audio probe establishes the connection between the pedal and your amp.
Next, connect the black test lead to a grounding point on your pedal. I've attached it to the enclosure, using masking tape to protect the paint. Use the red test lead as a probe; I've clipped it to a small screwdriver for this purpose. Ensure that your pedal is both powered and engaged.

Now that everything is in place, you can play the loop and follow the signal path through the circuit using a circuit diagram, probing at each step. If you encounter a point where no audio signal is detected, you've likely pinpointed the source of the issue.
Topics
Related Articles
How to Remove Stubborn Solder from a Through-hole PCB Pad
Learn how to tackle stubborn solder in through-hole PCB pads that seem impossible to remove. If traditional methods like solder suckers and desoldering wicks haven't worked, try this!
Boss SD-1 "C6" Mod
While the online community debates the controversial Boss SD-1 "C6" mod, it's so simple, why not try it for yourself?
Comments